Danishes!
Okay, so it's been a month since my last post. I've been dealing with nerve problems in my right (dominant) arm, so it's been hard to type and pretty much anything requiring fine motor skills.
Today I had a danish party. I made the dough and fillings from scratch. Yes, I made danish dough; it takes at least two days to make, so prior planning is key. The recipe for the danish dough is from Baking with Julia by Dorie Greenspan (William Morrow and Company, Inc.: New York. 1996), which I mentioned in my Julia Child post. It's fairly simple, especially if you have a food processor. I follow the recipe mostly. Why does the dough take 2 days to make? It has to be refrigerated after mixing (for at least 8 hours) and after rolling (at least 1 hour). The dough is enough for two danish braids.
The filling I used for the danishes today was cherry. Here's the recipe I developed:
1 can tart red cherries - packed in water (14.5 oz)
½ cup cherry preserves
1/4 cup corn starch.
You drain the cherry juice/water into a pot and add the cornstarch, whisking to mix. You heat the mixture over medium heat, stirring constantly. Add the cherry preserves and continue stirring. When the mixture starts to thicken, add the cherries from the can. Continue stirring until the mixture becomes becomes thick and the cornstarch has changed from white to transperant. Remove from heat and cool. This makes enough for two danish braids.
There's a second filling that goes in the danish. It's confectioner's cream, and the recipe is also in the Baking with Julia book. One recipe also makes enough for 2 danish braids (see a pattern yet?).
So, one of my roommates was kind enough to document the construction process for a danish braid.
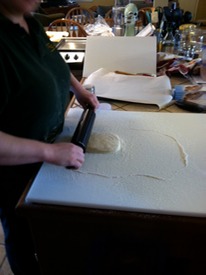
Step 1: Remove danish dough from refrigerator, and pat it into a rectangular shape. Put it on a floured surface to start rolling it out.
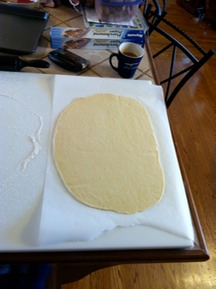
Step 2: After rolling the dough into a rectangle about 10 inches by 16 inches, move the dough onto a piece of parchment paper (you will be putting the parch on the pan that you'll bake the danish on).
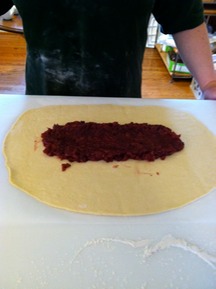
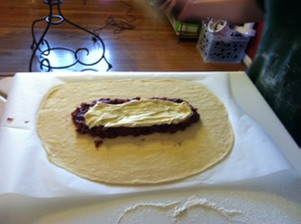
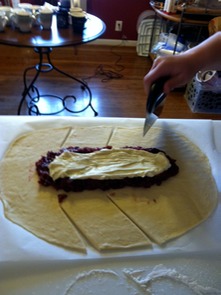
Step 3: Add the cherry filling to the center third of the dough. Then the confectioner's cream goes on top of the cherry.
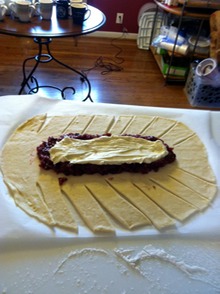
Step 4: Cut the strips for the braid at an angle. I usually cut the strips into equal sizes. It's hard for me to explain, but I have a couple of pictures to give you an idea how I do it.
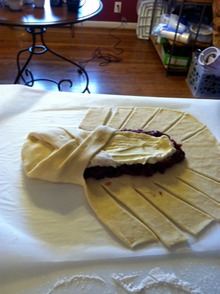
Step 5: Braiding! Start from the end that when you are standing at the opposite end of the braid, the cuts are pointing down (the left side in the above picture). Fold the top down over the filling. Take the strips and cross them over each other, always using crosing from the same side each time. Okay, that sounds confusing, but maybe a picture will help.
Step 6: Using a beaten egg white, brush the top of the braid completely with the egg white. Then, sprinkle a generous amount of turbinado sugar (most common brand name is "Sugar in the Raw") over the entire danish. Move the parchment paper with the danish on it onto a sheet pan. You'll cover it with a light towel and let it rise for 30 minutes before baking. Make sure your oven rack is set in the middle of the over, and preheat it to 400F.
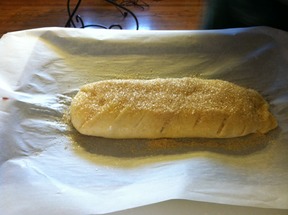
Step 7: Remove towel and bake for 20 minutes. Remove from oven and cool for a couple of minutes before cutting it up for enjoyment!
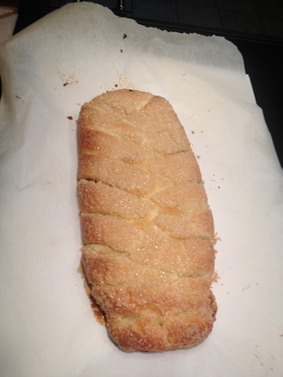
Mmmm, danish!
peace and laters,
Decker
Yogurt Buttercream Frosting
It's been awhile since I've made a non-cream cheese buttercream frosting. So, I decided to try out my yogurt buttercream again. I haven't made it since 2009 or 2010 (can't remember if I got a cake order in 2010 with it or not), and it was a hit then. I didn't have my yogurt cheese maker then. I put the non-fat plain yogurt in it to thicken a couple of days beforehand.
A yogurt cheese maker, which I have explained in my second cheesecake post, is a fine mesh strainer for separating the whey (liquid) from the curds (milk solids). If you don't have a yogurt cheese maker, you can use cheesecloth instead.
I used half of the butter I usually use in buttercream frosting and replace the other half with the yogurt cheese. So, without further ado, here's my Chocolate Yogurt Buttercream Frosting:
Ingredients:
½ cup butter, softened (1 stick)
3/4 cup non-fat plain yogurt thickened to ½ cup non-fat plain yogurt cheese
1 cup cocoa powder (weight - 3.75 oz)
4 cups powdered sugar (weight - 1 lb.)
1 tsp. vanilla extract
2 Tb milk - minimum amount (adjust for desired consistency)
In a mixer, beat butter and yogurt cheese until thoroughly mixed. Add vanilla and beat. Add powdered sugar and cocoa powder and beat. Add milk, a tablespoon at a time, and beat between additions. Beat thoroughly. Enjoy!
I think it tastes almost identical to my regular buttercream, but it has less fat!
FYI - I don't use shortening in my buttercream, only butter. I don't use shortening in my baking.
Finally! The Red Velvet Cake recipe search is OVER!
So, yesterday I was in the mood to bake a cake from a recipe that I had never tried before. I'm not sure why I had the hankering for baking. I guess that comes from just being Decker.
This post is mainly a review of a cookbook; I have not posted the actual recipe because of copyright.
My friend, Linda Carter, gave me a dessert cookbook for my 30th birthday this past January, Desserts from the Famous Loveless Cafe: Simple Southern Pies, Puddings, Cakes, and Cobblers from Nashville's Landmark Restaurant by Alisa Huntsman. While I've been to the Loveless Cafe several times, I had never had eaten any of the desserts there; I was always too full from dinner. So, I didn't know what to expect from this cookbook.
I noticed that there is a Red Velvet Cake recipe in it, and it looked like it had potential. There weren't any crazy instructions like mixing the baking soda and vinegar together BEFORE putting them in the batter (this defeats the purpose of the baking soda by releasing the carbon dioxide from the baking soda before baking thus reducing its leavening properties - which means a very dense cake). So, I made a mental note of the recipe and decided to come back to it when the time was right.
I started using recipes out of this cookbook back in February. I fell in love with the chocolate pudding recipe, and I use the vanilla pudding for my version of Boston Cream pie. I discovered that you can use goat's milk instead of the half-and-half for people with cow milk allergies. More on puddings at a later date.
So, if you've read my previous post about Red Velvet Cake on Blogspot, you'll know that making this type of cake usually creeps me out. This recipe uses HALF of the red food coloring that other recipes I've found use, and it uses more cocoa powder. The batter doesn't come out blood red. When finished, the cake comes out a lovely consistancy: fluffy with stability and tenderness. I've never liked eat Red Velvet Cake, but I really enjoyed this cake (FYI - I am a cake snob, which I guess is not surprising).
So, if you love Red Velvet Cake, try this recipe out!
A Salute to Julia Child
Today marks the 100th birthday of Julia Child. I wanted to share about one of my favorite cooking shows of all time, "Baking with Julia", which aired on PBS in the 1990s.
Julia Child hosted the show; she was in the kitchen learning from master bakers whom she inspired. You could tell how much the guests were excited and honored to be in the kitchen with her.
There is a book with the recipes from the show that I highly recommend: Baking with Julia by Dorie Greenspan (William Morrow and Company, Inc.: New York. 1996). I craved this book for years before I got it; it was worth the wait.
For those of you who have had my danishes, this is where I found the recipe for the dough (I came up with the fillings).
Oh, enjoy this tribute that PBS put together.
Note About Recipes Posted
I love to share my recipes. I will give the source of the recipe (website, TV show, and/or cookbook), let you know if I have or haven't modified it, and let you know why I modified it. For the experienced bakers, I'll post the recipe with basic directions in one chunk of text in order to make it easy to copy and paste into personal recipe collections.
When I say "basic directions", I assume that the common techniques I name are known by the baker. Don't worry! I will define terms and try to describe techniques to the best of my ability for the novices.
New Site! with (hopefully) more regular updating :-)
I'm moving my blog to this site from blogger. Old posts are still there. Everything new will be here.